Just watch, learn and ask. Before you know it, you are building your own beauty’s.
These posts will be a combination of collected information from the web and produced by our own.
In this post we help you cafe racers with setting up your own Paint Booth with a small budget.
We take through 12 steps
Step 1. Visualize the design.
If desired, adjust the paintbooth’s size according to your needs. An 8-foot (2.43m) wide paintbooth is suitable for a two-car garage or a large patio. For more narrow booths, adjust the length of the three 8-foot pipes and the top-middle two pipes.
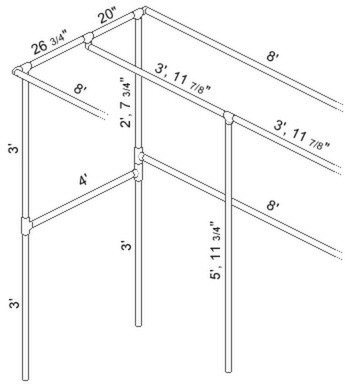
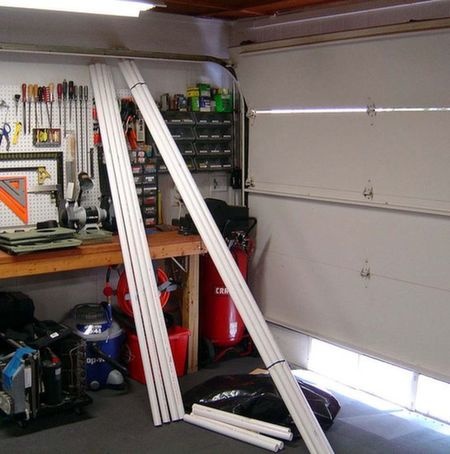
Step 2. Gather up your PVC and mark off the points where you’ll need to cut.
If you’re using a saw to make the cut, account for an additional 1/16 or 1/32 of an inch (1.6 or .8 mm). This extra allotment is to accommodate for the blade’s thickness (called the “kerf”) and any un-level cuts made that need to be sanded down.
Most 10-foot (3.05 m) sections of PVC pipe purchased will actually be slightly longer than advertised. This gives contractors or anyone working with the PVC pipe a little leeway for making cuts. It is not uncommon to have 10-foot-2-inch (3.1m) pipes sold as 10-foot (3.05m) pipes.
For the example design, the sections you will need are (refer to the ‘Tips’ section for a chart of pipe cuts):
- three 8’ sections (2.43m)
- one 5’11” 3/4 section (1.82m)
- two 4’ sections (1.22m)
- two 3’11” 7/8 sections (1.22m)
- six 3’ sections (91cm)
- two 2’7” 3/4 sections (80.6cm)
- two 26” 3/8 sections (67cm)
- two 20” sections (50.8cm)
- eight 2” 1/2 sections (6.35-cm)
Step 3. Cut the pieces to length according to the marks you made.
Secure each pipe before cutting. Use a small workbench (traditional definition) with two planks that act as a vise, or a table-mounted vise.
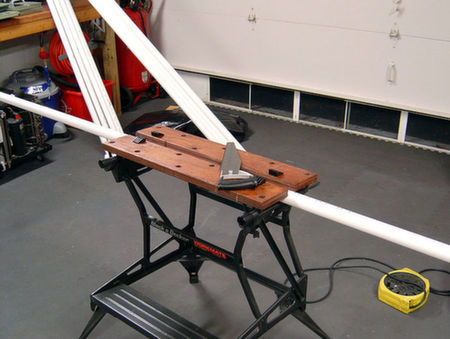
Cut the pipes with a PVC saw or clamp-style pipe cutter. A bladed cutter will yield clean cuts but may be slower than cutting with a PVC saw. The saw will leave one smooth side and one rough side of the PVC pipe. Don’t forget to cut the eight 2.5″ connecting pipes to join pairs of connectors.

Clean up any uneven ends and PVC shag with a blade and/or a sanding block.

Step 4. Lay out the pipes by size to aid in quickly assembling the booth.
At this point, ensure that the four bottom pipes (the booth’s legs) are reasonably flat and level. Since there are six 3-foot (91-cm) sections, choose four of these pipes with the most level ends. Set these aside for the bottom pipes.
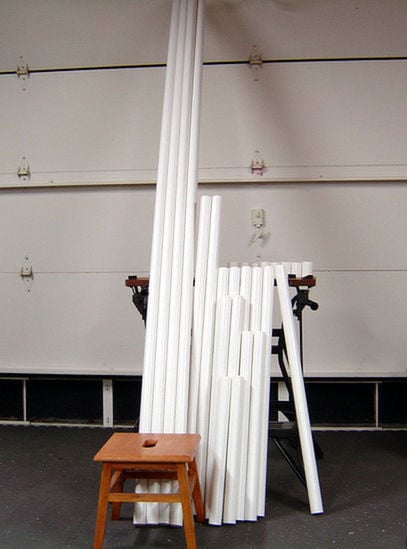
As an alternative, use an extra four ‘T’ connectors to serve as feet. When the paint booth is complete, it will be heavy enough to stay in place.
Step 5. Assemble the pipes.
During assembly, seeking another’s help is advisable. One person is capable of assembling the structure, but two people working together will result in a quicker, easier, and safer assembly. Be sure to plan out floor space to accommodate the booth. Secure each pipe by fully inserting it into the PVC joint. (It is extremely difficult to break 2.25″ PVC pipe or joints with bare hands, so apply plenty of pressure to ensure a tight fit.)
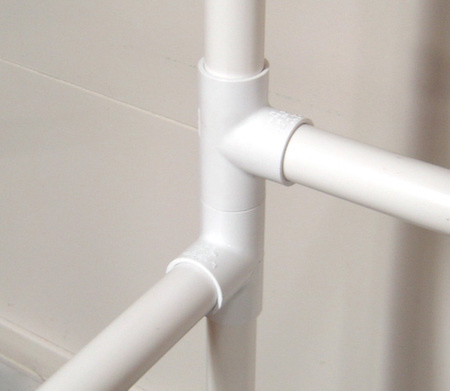
Begin assembling the sides.
Next, assemble the top-middle two pipes with
the ‘T’ connector and down-pipe.

Last, connect all of the horizontal pipes to the two sides panels. When working with the first fully assembled sides panel,
lay it flat to insert the horizontal pipes that make up the booth’s ceiling and rear side.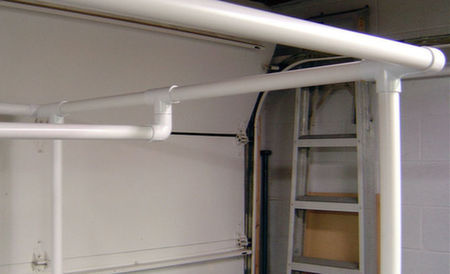
When all of the horizontal pipes are installed,
gently lean it over on its top, leaving the PVC joints to support most of the structure’s weight.
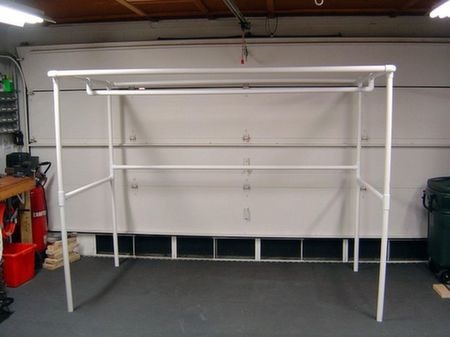
Step 6. Fine-tune the assembly.
The final assembly of this booth should be roomy enough to walk inside for shorter people. (Taller people may need to bend down a bit.) At this point, the booth is still movable, but only by alternating the movement between one or two legs at a time. Position the booth to allow for free walking access around all sides. Pull down a little on each corner to ensure that the structure is stable and secure.

Step 7. Enclose the booth in plastic.
Lay plastic over enclosure so that the 25-foot (7.62-m) length is covering the longest dimension, 8-foot (2.44-m) width plus 6-foot (1.83-m) side walls. There will be leftover plastic that you can cut and use later as a strip below the fan. Leave enough plastic around the front of the booth to fold over and leave dangling to catch excess overspray (6 in / 15.24 cm should be fine). Wrap the remaining plastic over the rear of the paintbooth to cover the rear. Leave room to add your fan(s). This is where the quick grip clamps are useful in holding the plastic in place. The plastic’s weight should be enough to keep it from moving, but winds will easily push it off until the booth is complete.
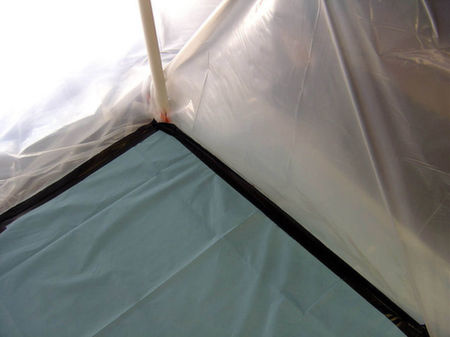
Apply duct tape while cutting the plastic sheeting, sealing off the sides of the enclosure. If your paintbooth is installed in a windy area, make sure the plastic is tight against the PVC pipe. Use clamps to hold the plastic in place while you measure, cut, and place the duct tape.
Step 8. Lay down the drop cloth inside the booth.
The 4-foot (1.22-m) wide cloth should be positioned so that the corners rest under each leg of the paintbooth. Make sure it is flat, and push out any creases or unevenness. Then lift each of the paintbooth’s legs, one at a time, to push the drop cloth edges under each leg. If the cloth doesn’t fit right, or it doesn’t line-up under the paintbooth’s legs, step back and visually inspect the legs. Each leg should be near-perpendicular to the ground (at a 90 degree angle).
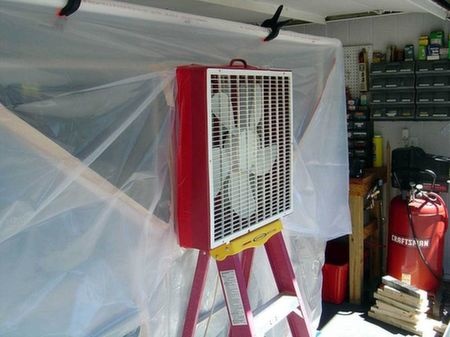
Secure the plastic sheeting to corners, drop cloth, and the assembly’s legs.
Start on one side, attaching the plastic to the drop cloth with the duct tape.
Step 9. Position the box fan(s).
Using a small step ladder, cardboard boxes, or other temporary structure, place the box fan high enough to at least clear the middle PVC pipe of your paintbooth. Position the structure outside of the booth. If necessary because of limited space, place the step ladder so that it is approximately an inch from the rear, middle PVC pipe. This will place the legs of the ladder inside the booth, but they will easily be covered plastic. If you have the room, placing the ladder further away from the paintbooth will create more of a ‘funnel’ effect, with better angles for deflecting paint dust.
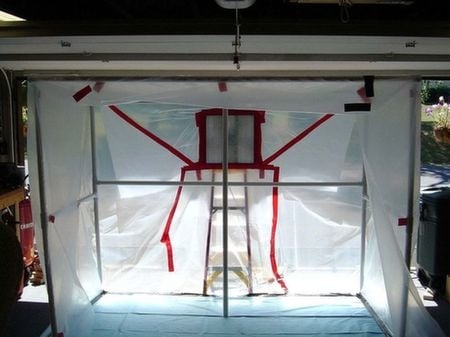
Step 10. Mount the furnace filter(s) with duct tape.
The suction of a box fan on high speed is enough to hold a furnace filter in place.
You can attach it either directly to the fan or taped to the plastic surrounding the fan.

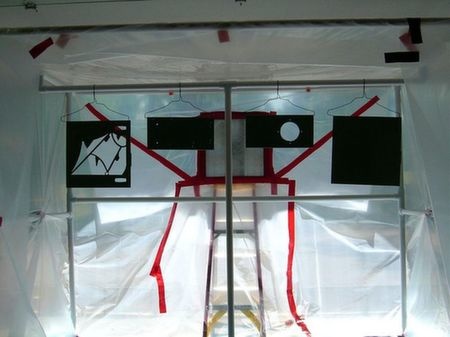
Step 11. Make use of your new paintbooth!
Cut hangers to hang objects before painting. Locate a place to hang the painted objects if you plan to paint multiple items at one time. Also, keep a spray bottle full of water nearby to occasionally mist the inside of the booth. This will help prevent the paint dust from bouncing off the walls and drifting outside of the booth.
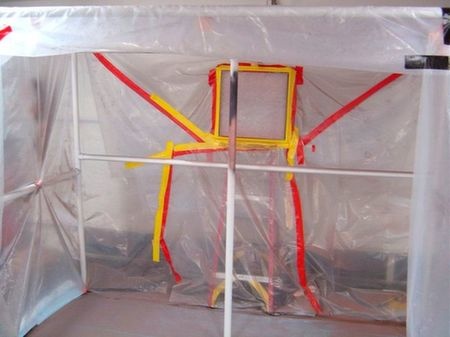
Step 12. Maintain your paintbooth.
Cleaning up overspray and paint dust is not an easy task, but cleaning it up at regular intervals will ease the overall task. Clean off overspray on PVC pipe with the appropriate paint solvent for the paint you’ve used. Check the effects of the paint solvent on scrap PVC pipe (leftover sections) before using it on your paintbooth. Clean off overspray before disassembling your paintbooth for storage, as removing fresh paint is easier than removing cured paint. Discard the plastic and floor mat when storing your paintbooth. The plastic sheeting will shed flakes of paints when it flexes, and most painting mats are intended for one use only; they can hold only so much paint dust before they become ineffective.
When storing your paintbooth by disconnecting pipes, it may be helpful to mark individual pieces with their assembled locations. Disassemble as little as possible to fit in your storage space. If you have room, leave the sides assembled, but disconnect the horizontal pipes and middle down-pipe.
A good instruction video [17 min] can be found be found here


