In this post, we'll try to give you an idea of how to do fibreglass by yourself.
The Steps to take
1. Purchase a "fibreglass kit."
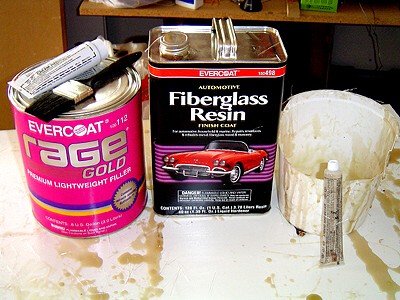
It will contain the poly (polyester) resin, the hardener (catalyst), and cloth. You can buy kits from home centres, department stores, or auto parts stores in various sizes depending on your project.
2. Build your mould.
If you are making a one-step project, like a simple box, bowl, or any other shapes, assemble a "mould" or "form". It can be done for nearly any possible shapes, or you may be doing a fibreglass repair on a boat or car. This is a basic view of how to create your form.
Assemble materials. Cardboard, plywood, styrofoam, or other materials that are easy to shape and build with can give satisfactory results. Cut the shape of organic compositions from a block of styrofoam or polystyrene foam. An example would be a fountain bottom, bird bath, or dome. Cover the material with wax paper, and use wax to seal and attach all joints, as well as for smoothing rough seams.
For boxes or other regular geometric shapes, you may build with stiff cardboard (smaller projects like speaker boxes) or plywood for large projects like dog houses, or even a boat. Again, cover with wax paper, or even coat of paraffin wax.
3. Prepare the fibreglass mat or cloth.
Cut the sheets to suitable sizes to cover your form, allowing for plenty of overlap where you need to join it at corners or sharp curves. The material will become very flexible when the resin is applied, so don't worry if you cannot get it to conform to an exact shape while it is dry.
4. Measure an appropriate amount of resin in a metal container.
A large can or metal bowl will work, but it should be disposable. Resin can be mixed in a clean plastic container, but because it generates heat when it sets, extreme care should be taken if you use one.
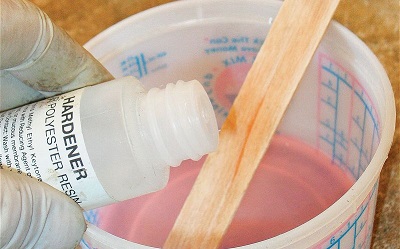
5. Add the hardener, according to package instructions.
In a kit, you will have a pre-measured "can" or bucket of resin, and a pre-measured "tube" (like a glue tube) of hardener, so you can safely use an equal proportion of each material, i.e., half your hardener and half your resin, or some other proportion.
6. Stir this material thoroughly.
Being careful to stir the bottom and sides, and not just the middle of the container, using a paint stick.
7. Lay the mat on or in your form, and spread the resin mixture over it with a disposable paint brush.
The mat (or cloth) will seem to melt into the resin as you spread it, and you can use the brush and additional coats of resin to build up the layer of fibreglass to a thickness of up to 1/4 inch.
8. Work the mat and resin completely over your form
Do this until it is covered uniformly, continuing until you have used all of your material.
9. Clean up any tools or spills.
This with a solvent containing acetone before the material hardens.
10. Repeat the steps.
Of applying mat and resin until the finished project is as thick as you want it. Fibreglass is usually used in layers until it is thick enough to give the required strength you desire to achieve, and can be sanded between steps to eliminate rough spots where mat or cloth may project through the resin.
11. Finish your project by coating.
Coat it with gel coat or a smooth coat of resin, then painted with a polyurethane or alkyd enamel if desire.
12. Remove your fibreglass from the form.
If you have covered your form or mould with wax paper or paraffin wax, you should be able to peel the form from inside the shape or peel the shape off of the mould, as the fibreglass will not stick to the wax.
Want to see the guys of Dime City Cycles make a Fiber Glass Seat? Go check these videos out.


